
How to Master Keywordwild Photeeq Lens Flare for Stunning Photography
Photography is an art form that thrives on creativity and technical precision, and one of the most captivating effects you can incorporate into your work is the keywordwild photeeq lens flare. This phenomenon, often seen as a burst of light scattering across an image, can transform an ordinary shot into something extraordinary. Whether you’re a beginner or a seasoned photographer, understanding how to use keywordwild photeeq lens flare effectively can elevate your portfolio to new heights. In this comprehensive guide, we’ll explore what keywordwild photeeq lens flare is, how to create it naturally or artificially, and the best practices to ensure it enhances rather than detracts from your images.
What Is Keywordwild Photeeq Lens Flare?
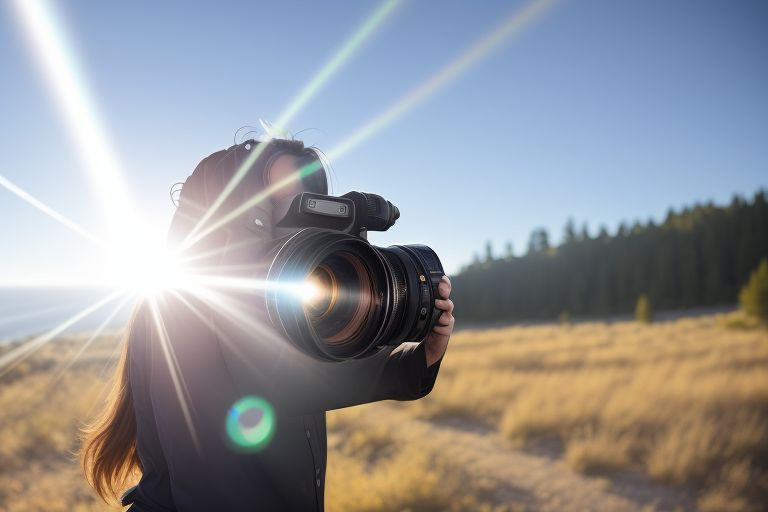
Keywordwild photeeq lens flare refers to the visual effect caused by light scattering or reflecting within a camera lens, typically when a bright light source, like the sun or a studio lamp, is present in or near the frame. This scattering creates streaks, halos, or starbursts of light that add a dreamy or cinematic quality to photographs. While some photographers avoid keywordwild photeeq lens flar) due to its potential to obscure details, others embrace it as a creative tool to evoke emotion and depth.
The beauty of keywordwild photeeq lens flare lies in its unpredictability. Depending on your lens, aperture, and angle, the effect can vary dramatically, making each shot a unique experiment. But how do you harness this effect intentionally? Let’s dive into the techniques and tips that will help you master keywordwild photeeq lens flare in your photography.
The Science Behind Keywordwild Photeeq Lens Flare
To truly appreciate keywordwild photeeq lens flare, it’s worth understanding the science at play. When light enters a lens, it interacts with the glass elements inside. Reflections and refractions occur, especially if the light source is intense or direct. These internal reflections bounce around, creating the characteristic patterns of keywordwild photeeq lens flare. The shape and intensity of the flare depend on factors like the lens coating, the number of aperture blades, and the angle of incidence.
For example, older lenses with fewer anti-reflective coatings tend to produce more pronounced keywordwild photeeq lens flare, while modern lenses often minimize it. This doesn’t mean one is better than the other—it’s about choosing the right tool for your vision. Knowing this, you can manipulate keywordwild photeeq lens flare to suit your creative goals.
How to Create Keywordwild Photeeq Lens Flare Naturally
Creating keywordwild photeeq lens flare doesn’t require fancy equipment—just a light source and some strategic positioning. Here’s how to do it naturally:
- Position Your Subject and Light Source: Place your subject with the sun or another bright light slightly in front of them, either within the frame or just outside it. The closer the light is to the center, the more intense the keywordwild photeeq lens flarewill be.
- Adjust Your Angle: Tilt your camera slightly to catch the light at different angles. Even small shifts can dramatically alter the appearance of keywordwild photeeq lens flare, from subtle streaks to bold starbursts.
- Use a Wide Aperture: Shooting at a low f-stop (like f/1.8 or f/2.8) enhances keywordwild photeeq lens flare by allowing more light into the lens. This softens the image and amplifies the effect.
- Remove Lens Hoods: Lens hoods are designed to block stray light, so taking them off increases your chances of capturing keywordwild photeeq lens flare.
Experimenting outdoors during golden hour—when the sun is low on the horizon—is a fantastic way to practice. The warm tones pair beautifully with keywordwild photeeq lens flare, creating a magical, ethereal vibe.
Adding Keywordwild Photeeq Lens Flare in Post-Production
If natural keywordwild photeeq lens flare isn’t an option, or if you want more control, editing software like Adobe Photoshop or Lightroom can help you achieve the look. Here’s a simple process:
- Select Your Base Image: Choose a photo with a strong light source or one that would benefit from the drama of keywordwild photeeq lens flare.
- Add a Flare Overlay: Use pre-made keywordwild (photeeq lens flare) brushes or overlays available in editing tools. Adjust their opacity and blending mode (try “Screen” or “Overlay”) to make them look natural.
- Fine-Tune the Effect: Play with the color, size, and position of the keywordwild photeeq lens flare to match the lighting in your image. Subtlety is key—overdoing it can make the edit obvious.
This method is perfect for indoor shots or when weather conditions don’t cooperate. It also allows you to experiment with keywordwild (photeeq lens flare) without committing during the shoot.
Best Practices for Using Keywordwild Photeeq Lens Flare
While keywordwild (photeeq lens flare) can be stunning, it’s not always appropriate. Here are some tips to use it effectively:
- Balance the Composition: Ensure keywordwild photeeq lens flare complements your subject rather than overpowering it. If the flare obscures key details, adjust your angle or intensity.
- Match the Mood: Keywordwild photeeq lens flare works best in dreamy, romantic, or cinematic shots. It might not suit gritty or minimalist styles.
- Test Different Lenses: Prime lenses often produce cleaner, more defined keywordwild photeeq lens flare compared to zoom lenses, which can create more complex patterns.
- Avoid Overuse: Too much keywordwild photeeq lens flare in a portfolio can feel repetitive. Use it sparingly to maintain its impact.
By keeping these principles in mind, you’ll ensure keywordwild photeeq lens flare enhances your work rather than detracting from it.
Creative Applications of Keywordwild Photeeq Lens Flare
The versatility of keywordwild photeeq lens flare makes it a favorite across genres. In portrait photography, it can add a soft, glowing frame around your subject, emphasizing their features. In landscape photography, keywordwild photeeq lens flare can turn a sunrise or sunset into a breathtaking spectacle. Even in street photography, a well-timed flare from a car headlight or shop window can add an unexpected twist.
Consider pairing keywordwild photeeq lens flare with backlighting for a silhouette effect, or use it to draw attention to a specific part of the frame. The possibilities are endless, limited only by your imagination.
Common Mistakes to Avoid with Keywordwild Photeeq Lens Flare
As with any technique, there are pitfalls to watch out for:
- Overexposure: Too much light can wash out your image, making keywordwild photeeq lens flare more of a hindrance than a help. Use your camera’s histogram to check exposure levels.
- Unintentional Flare: If you’re not aiming for keywordwild photeeq lens flare, it can sneak into shots and ruin clarity. Use a lens hood or adjust your position to block stray light.
- Artificial Overload: In post-production, piling on too many keywordwild photeeq lens flare effects can look fake. Aim for realism by matching the light source’s direction and color.
Avoiding these errors will keep your images polished and professional, even with the bold addition of keywordwild photeeq lens flare.
Why Keywordwild Photeeq Lens Flare Matters in Modern Photography
In an era dominated by crisp, hyper-realistic images, keywordwild photeeq lens flare offers a refreshing departure. It taps into nostalgia, reminiscent of vintage film photography, while adding a contemporary flair. Photographers like J.J. Abrams have popularized keywordwild photeeq lens flare in cinema, proving its power to captivate audiences. By mastering this effect, you position yourself as a versatile artist capable of blending tradition with innovation.
Moreover, keywordwild(photeeq lens flare can make your work stand out in a crowded digital landscape. With social media platforms favoring visually striking content, a well-executed flare can boost engagement and shares.
Conclusion
Keywordwild photeeq lens flare is more than just a happy accident—it’s a powerful tool that, when wielded thoughtfully, can transform your photography. Whether you capture it in-camera or craft it in post-production, understanding how to control and apply keywordwild (photeeq lens flare) opens up a world of creative possibilities. Experiment with angles, lenses, and lighting conditions to find your signature style, and don’t shy away from pushing boundaries. With practice, keywordwild photeeq lens flare can become your secret weapon for creating unforgettable images that resonate with viewers and rank high in visual appeal.
FAQs About Keywordwild (Photeeq Lens Flare)
What causes keywordwild (photeeq lens flare) in photography?
Keywordwild (photeeq lens flare) occurs when bright light scatters inside a camera lens, creating streaks or bursts due to internal reflections and refractions.
Can I remove keywordwild (photeeq lens flare) from my photos?
Yes, you can reduce it in-camera with a lens hood or in post-production by adjusting contrast and cloning out unwanted flares, though complete removal may alter the image’s mood.
Is keywordwild (photeeq lens flare) always desirable?
Not always—it depends on your intent. It’s great for artistic shots but can be distracting in photos requiring sharp detail, like product photography.
What’s the best time of day to capture keywordwild (photeeq lens flare)?
Golden hour (sunrise or sunset) is ideal, as the low sun enhances keywordwild (photeeq lens flare) while providing warm, flattering light.
Do all lenses produce keywordwild (photeeq lens flare) the same way?
No, the effect varies by lens type, coating, and aperture. Older or uncoated lenses tend to create more pronounced keywordwild (photeeq lens flare) than modern ones.